Would you like to create new information fields on your contact sheets?
Do you need to record additional data on your business or delivery notes?
With the"Custom fields" app, add new fields to record, in a structured way, information about your customers, business, sales, deliveries, tasks, projects, documents, etc.
Use custom fields to collect and archive useful information specific to your business!
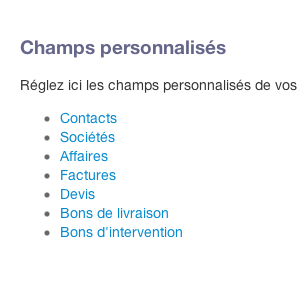
Activating the app gives you access to a custom fields configuration page, for the following objects in the application:
- Contact
- Companies
- Products
- Product categories
- Purchasing
- Conversations / Tickets
- Business
- Bills
- Quote
- Delivery notes
- Work orders
- Supplier purchase orders
- Tasks
- Projects
- Documents
- Notes
- Contracts
- Series numbers
- Batch numbers
- Job offers
- Candidates
- Interviews
- Resources
- Production files
1. Creating custom fields
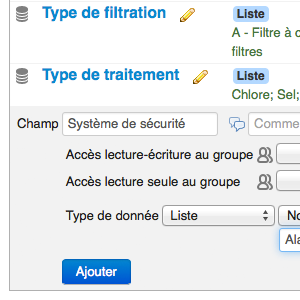
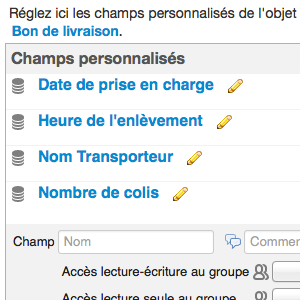
To create a custom field, go to the app's home page, then click on the name of the object to which you wish to add a custom field.
A new page is displayed, allowing you to create as many fields as you need and :
- Name your field
- Indicate the response format via the"Data type" line:"text" field to freely enter a response or"list" field to indicate a list of response items which you can then select via a drop-down menu.
- Select whether data is accessible in"Read-write access to a group" or"Read-only access to the group", if you have the user group management app.
- Add a comment if you wish.
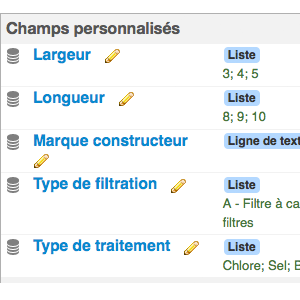
2. Custom field type management
Several types of data are available:
- Text line or Text paragraph for freely entering an answer
- List or Multiple list to specify a list of response items, which you can then select from a drop-down menu.
- Check box to answer Yes or No
- Date to archive a specific date on an object
- Table for entering hierarchical values based on columns and rows.
- Whole number or number with decimal places for setting numerical values that can then be calculated
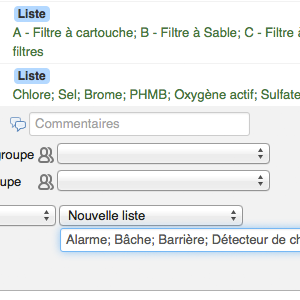
If you select the "list" type, the application will prompt you to enter the list of possible answer options. In the answer options box, enter the values separated by semicolons. Example:
- The name of your field is: Construction type
- To be taken into account, answer values must be entered as follows: concrete; brick; stone; wood; straw; metal.
If you select the "Table" type, you will then need to set the number of columns and rows required.
3. Display order within an object
When entering your custom fields, you can organize the order in which the fields are displayed on your objects, using the "drag & drop" function.
For custom fields in your contacts to rearrange them in an order other than the one in which you saved them: click on the handle to the left of the field name and drag to the position you require.
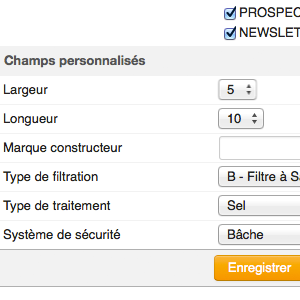
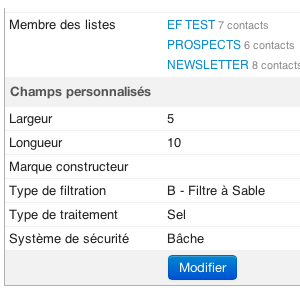
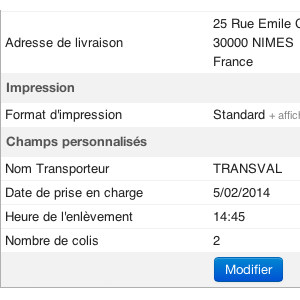
4. Entering fields in an object
Once you've set up your data collection fields, you'll find them on the objects, and can complete them.
They are added to your forms, in the data entry forms, in an area called "Custom fields". Go to this area to enter the content.
5. Complementary Apps
The "Custom fields on PDF" and "Custom fields product by product" apps are complementary to the custom fields app.
- The "Custom fields on PDF" app lets you display them on PDFs of sales documents.
- The "Custom fields product by product" app lets you define not a custom field common to all products, but a custom field only for the product on which it is defined.
6. App settings
Several custom field processing options are available in the "Settings" tab.
You can choose to :
- Display customized product fields on sales document lines
- Export the value of customized product fields on sales document line exports
- Default "No" for checkbox fields (yes/no)